
About Me

Hello! My name is Luke DeVries, and I am currently a second year mechanical engineering student at the University of North Carolina at Charlotte.
For most of my time going through high school, I had no direction for my intention of going to a four year university. I always tried hard in my classes, worked full-time at a Chick-Fil-A, and knew that math and science were my favorite subjects to learn, but I really had no idea what kind of major I would pursue after high school. I assumed a mathematics, physics, or teaching degree might be what I would do best in, and to be completely honest, I hardly had any idea what an engineer was! I had heard about the profession countless times, but never had a clear image of what they did or what they studied. I probably would have never looked further into it, but at the end of my junior year, my physics teacher told me that I would make a great engineer and hoped I would pursue something in the field as I got older. This was my first big motivator to look into what engineering really was, and I quickly fell in love with the application and practical nature of most engineering professions. Not only did I find that engineering was a great way to apply the math and science topics that I found most interesting, but I quickly realized that there are so many different routes to pursue with a seemingly endless list of disciplines that I could study at most universities. I did my best to look into the ones that interested me most like systems, industrial, mechanical, and computer engineering, but I've always admired the ability to adapt and know a little about everything which led me to my final decision. Mechanical engineering seemed to be the most versatile, and it felt like a safe option for me as I started my time at UNCC. Since then, I have been repeatedly reassured through my new experiences and studies, that mechanical engineering is the profession I would like to find myself in after my time at UNCC. I particularly find myself interested in the process of manufacturing, since I know I take it for granted every day. There is meticulous design and decision making behind nearly every product and item I have ever owned, yet I am still learning even the basic principles for the simplest products. I love a good challenge, and understanding the process to create things has proved to be just that. This challenge has also guided me towards a concentration that I hope to pursue, as I am continually shocked by the great levels of detail that can be achieved through modern engineering practices. During this same semester (Spring 2026), I am taking my introductory course for the precision and metrology concentration in mechanical engineering.
As a mechanical engineering student, I am extremely task driven. I always bring my best to every assignment, project, or exam and try to go the extra mile when possible. I'm not easily satisfied by my work, but I do everything I can to get it as close to perfection as possible. This drive can sometimes get me into trouble though, as I can remember many nights during my first year staying up much later than I should have tweaking and changing things right before the final submission or test. The most memorable time this happened was during ENGR 1201, preparing for the test of our mechanical design project. I stayed up until probably 4 or 5 am doing repeated tests in my dorm hallways getting my teams little vehicle to drive straighter and stop more consistently, and to be honest I still didn't feel ready by the time I went to bed. Testing was the next day, and with only two test runs and a limited time to tweak, it seemed that the late night troubleshooting was about to pay off. I'll admit it was far from perfect and probably happened due to some lucky circumstances, but our design made it closest to the objective and got my team full marks on the project test sheet. It was an amazing feeling for my team and I, and it is one of many experiences that has made me love the challenge of being a mechanical engineering student. The successes sure feel better, but even the failures push me to try harder and return to old projects when I can to see if a fresh perspective can solve something we missed before. It's always a challenge, but I love to chase every task until I meet the goal.
Mechanical design requires the ability to consider many factors and objectives. Often, it is easy to overlook some of the fundamental driving factors that dictate how one needs to design something. Many mechanical designs involve moving parts or moving systems, and with this comes a fundamental law, the conservation of momentum. Momentum itself is a principal that is tied to an object's velocity as seen explicitly in its formula p = mv, where p is momentum, m is mass, and v is velocity. Objects within a system can undergo a change in momentum, but due to the law of conservation of momentum, the system has to remain balanced and aligns with Newton's Third Law of Motion. This law states that for every action there is an equal and opposite reaction. Depending on the scale of the system, the designer must acknowledge this fundamental rule and account for things like a reaction to the moving part or the influence the object itself will have on its surroundings as it changes velocity. Not only is momentum an important factor in the objects functional design, but it can also play a big role in design for manufacturing (DFM). Many manufacturing processes utilize angular momentum and the resulting centrifugal force to shape or hold items in place. In fact, these machines also rely on being carefully calibrated to ensure that they have a smooth angular momentum and do not become unbalanced. A good mechanical designer should plan accordingly if their process will include one of these machines that rely on angular momentum, and if their design functionally relies on angular momentum, they must also ensure that it is balanced so that it does not become unstable. It becomes very hard then to ignore the influence that momentum has on the design process from the creation of the functional object itself to the tools that make its existence possible.
Analysis of an Everyday Object
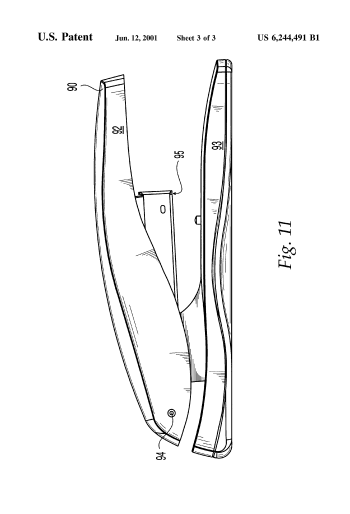
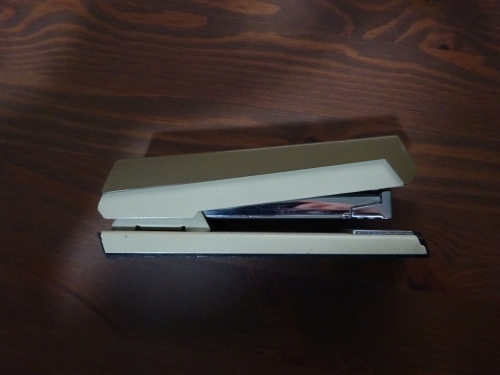
The hand held stapler is a tool that many people use everyday. It serves a very direct function of connecting multiple pieces of paper at a time while ensuring that they do not separate or become unordered. The design is direct, compact, and clear for its purpose. In addition to its main function of stapling items together, some staplers come with a prong that can be utilized to remove stables, but nearly all come with an easily accessible magazine to refill with new staples. The brand of my specific stapler is ACCO, which is the same company assigned for patent US6244491B1 Links to an external site.. This is the patent referenced above, and any subsequent figures also come from this patent. The credited inventors for this patent are Balaji Kandasamy, Scott Kouri, Sumir Kapur, and Stephen D. Berry, and the specialty they present for this stapler is its ability to efficiently join different quantities of paper due to an adjustable pivot axis at the rear of the stapler. (My stapler shown does not have this feature.)
Photo 1: 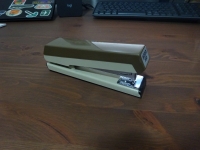
Photo number one shows the fairly compact form factor of my ACCO 50 which makes it easy to transport between locations and easily usable with only one hand. The body is made mostly of metal with a few plastic covers and a rubbery plastic base to help stabilize the stapler when being pressed down.
Photo 2: 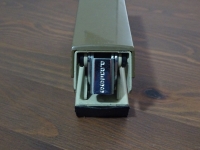
Photo number two is an image of the rear button which says "PRESS." When pressed, this button releases a spring loaded magazine where new staples are inserted.
Photo 3: 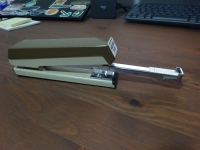
Photo number three shows the extended magazine. It reaches almost the same length as the body of the stapler which gives it plenty of room to fit a full stick of new staples and be tucked away nicely within the internal body of the stapler itself.
Photo 4: 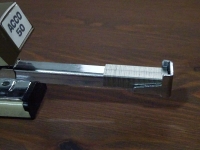
Photo number four is a closer image to show how the staples fit in the extended magazine. I clearly have room to fit about half of a new stick of staples, but the spring that launches the magazine also pushes any remaining staples to the front to be utilized regardless of its fullness.
Photo 5: 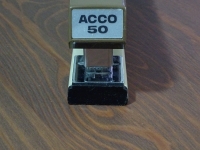
Photo number five is the front of my stapler. The front view is where the company put their logo and the product number, but this view also shows whats called the clinching anvil.
Photo 6: 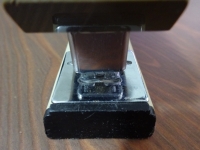
Photo number six is a closer shot of the staple leg clinching anvil. The purpose of this piece is to fold the legs of the staple behind the pieces of paper. Figure 8 of the patent sheet 2 might show this a little clearer, with the angled portions that guide the legs as the staple compresses.
Photo 7: 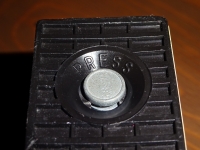
Photo number seven is an additional feature on my stapler located underneath the front clinching anvil. Again as instructed by the intentionally placed "PRESS" label, the anvil can be pressed upwards while staying attached to the body such that the user may rotate the anvil 180 degrees. This captive system approach makes the stapler more reliable and does not allow the user to lose the anvil during this process.
Photo 8: 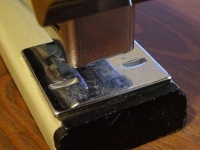
Photo number eight is the secondary position of my stapler's clinching anvil. In this orientation, you can see how the guides would spread the staple legs outwards instead of inwards. The user is able to switch easily between the two as they decide which one they prefer or which fits best for their intended use case.
Photo 9: 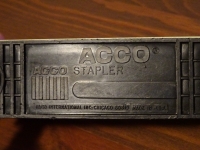
Photo number 9 shows the bottom side of the stapler. Here you can see the edges of the gripping pattern for the plastic base as well as some information about the company who produced the item. They also proudly claim to be made in the USA, although the print is hard to see in the bottom right of my image.
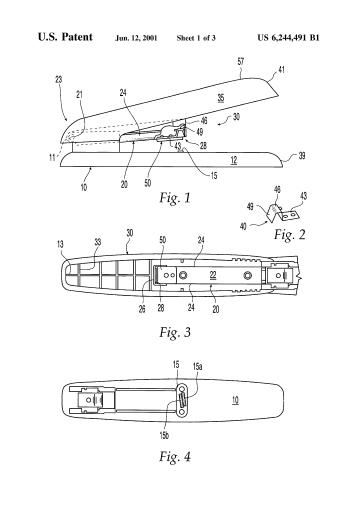
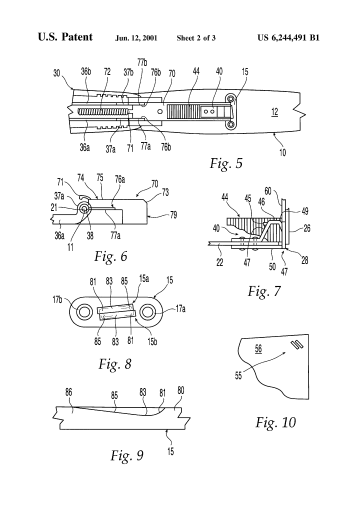
The figures above demonstrate the specifics of the hand held stapler described in patent US6244491B1, but there are numerous different patents for variations of the hand held stapler. Most serve the same main function, but as seen in my own personal stapler, they may have additional quality of life features. Some examples would be the pivot axis from this patent, a spring loaded stapler to ease the force needed to engage the staple, or a super compact stapler for additional ease in portability. In addition to the metal staple, there are other ways to join sheets of paper. A very simplistic and cheap alternative to a stapler is a paperclip while a more complex approach would be to use a paper stapler. The paper staple is a device that presses the stack of papers in a specific way, sometimes puncturing the pages, to join a stack of papers without the need of metal staples. The benefit would be that you are not reliant on buying more staples, but the cons would be reliability and the amount of pages you can join together.
Although I am unable to find specific manufacturing details for my ACCO 50, it is possible to reverse engineer and approximate the processes and locations for the parts of the stapler to be made. Likely, the body and internal portions would be made within the same factory with only items like the spring mechanism and staples being shipped in or manufactured elsewhere. The body itself is mostly metal, and would likely be formed into its shape via metal folding. The smaller metal parts used in the extending magazine would likely be formed the same way, and the assembly appears to rely on most of the metal components being pinched around a receiving piece of metal. The rubbery plastic base is likely formed by injection molding, which makes the grip pattern and item details easily repeatable and readable. This is mostly conjecture, but I believe these processes to be realistic and plausible for a stapler like the one shown in my photos. My specific stapler was also manufactured within the USA, and while ACCO is an international company, they are based out of Chicago. Therefore, their factories or plants may be in the greater Chicago area for ease of inspection, prototyping, and communication between the company and manufacturing/assembly processors.
This page of my ePortfolio took around six and a half hours to complete. This includes the time needed for my patent research, personal reflections, analyses, writings, welcome/landing page, photo taking, layout preparation, and proof reading.